Options #4 in the Site Editor
 A multitude of options and settings that you can use to configure and tune your Honor Level System program to meet the needs of your school are spread over four Options Windows in the Site Editor. To access the fourth window,
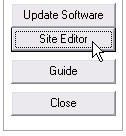
go to Utilities and open the editor as shown here on the right.
 Then click the Options #4 tab at the top of the window.
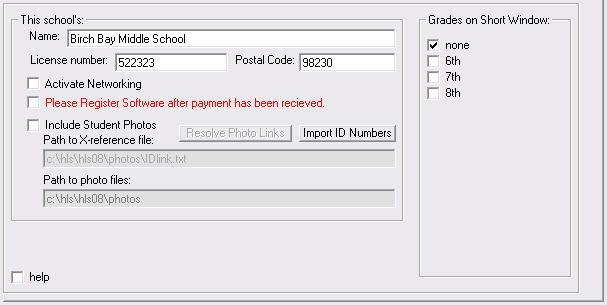
The options window will appear. It looks like this:

We will go over all of these features frame by frame below.
Your School Data
School Name
- This entry determines the way in which your school name is displayed on the screen and all of your documents. If you need to make a change here, please call us at 360-483-4885. Your license number (see the next item) is related to the text here. If you change the name, you will need a new license number. Let us help you with that.
License Number

- Each year, when we prepare you data, we set up your license number for you. Usually you do not need to change it here. If you upgrade to Full Networking or change the name of your school, you will need a new number. Please call us at 360-483-4885 and we will help you with that.
Postal Code

- When activating some of the HLS Upgrades, we use your zip code to help identify schools that have the same name. If your code is not here, it can be entered later if needed.
Activate Full Networking

To start up Full Networking you must first complete Sharing Setup
Then follow the directions to Activate Full Networking where you will be directed to check this box.
Registering Your Software

If you have already registered your software or if it was pre-registered, because we had received payment before you installed the program this year, this check box will not appear on your screen.
You should contact us if you are seeing a notice that your software license is about to expire. We will give you a number to enter when you check this box.
Call us at 360-483-4885.
Including Student Photos

 If you have ordered the Photo Upgrade this box needs to be checked. This is usually done for you automatically when you install the photo disk that we prepare for you.
There are two settings that are necessary for your software to find the photos. They can be edited here as you see on the right.
- Path to X-reference file Is the path and file name to a document that Crossreferences the Student ID Numbers with the file names of their photos.
- Path to photo files Is the path to a folder that contains all of the student photos. This is usally the same folder that contains the Crossreference File, but it does not have to be.
If needed, the actual photos can be stored elsewhere on your networking (although this will slow you program down) or it can point to the CD drive if you want to keep the disk in your computer when using HLS.
Importing Student ID Numbers

Your Photo Upgrade will need to find each student's ID number in their record. If these were not provided when the data was originally prepared they can be imported later.
Although this button will let you do this here, we will probably direct you to use the Import Demographic Data routine because it utilizes a wizard that walks you through the task. Call us for assistance. 360-483-4885
Grades on Short Window
 Click here for an explanation of the Short Window.
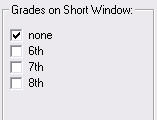
If you want to place all of the students of any grade on a short window, check the boxes that you see here on the right.
If any of your grades are missing from this list, you can added them using Options #3. The number of days in the short window is set in Options #1.
 Remember, you can always check the